This page will help campus users manage their test administrators by showing them how to add new, edit existing, and lock/inactive current test administrators.
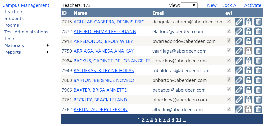
Selecting Test Administrators will show you a list of test administrators at your campus. Initially, 10 test administrators will be shown. To view additional test administrators, choose 10 or All from the View drop‐down menu. The test administrators' data is uploaded by the district. A campus user may add additional staff if they are not listed.
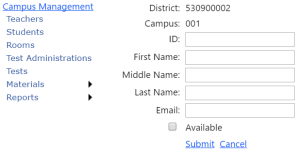
After clicking on New, you will be prompted to enter the test administrator's staff ID, first name, middle name, last name, and email address, and check the box next to Available – This will allow the test administrators to be assigned to a room for testing. Entry of the middle name and email address are not required to have the test administrators active in TestHound. The ID can be a staff ID, if applicable, or it can be anything the user decides, it does not matter to TestHound, what the ID is. Once the required fields have been completed, click Submit to create the new test administrators account. The new test administrators will be locked to prevent the file upload from overwriting the change.
You may also edit test administrators once they are entered. To edit a test administrator's account, select Edit next to the test administrator's name on the right.
In the event the updates from your district management system are incorrectly updating test administrator accounts at your campus, you may lock or block test administrator accounts to prevent further errors. Locking an account will prevent a test administrator account from being updated when a new test administrator's file is run while blocking an account will cause a test administrator's account to become inactive. Inactive test administrators' accounts cannot be assigned as test administrators. To lock test administrators to ensure they remain in the list of available test administrators you may either click Lock All to lock all accounts listed or click on the Lock icon on the appropriate test administrator line.

To block a test administrator's account from being imported into the test administrator list, click the block icon to inactivate the account. A message will appear verifying that you are blocking a test administrator account and it will prevent the account from being re-imported. If you wish to proceed, click OK.
Click on the Reactivate link at the top of the test administrators box. A list of test administrator accounts that have been blocked, will be listed. You may search for a test administrator's account or select a test administrator's account from those listed.
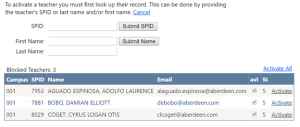
Click Activate next to a specific test administrator's name to activate the single test administrator or click Activate All to activate all test administrator accounts listed. If you activate a single test administrator account, you will remain on the test administrator's activation screen. To return to the test administrators list, select test administrators under the Campus Management menu. If you choose to activate all test administrator accounts, you will be returned to the test administrators list.