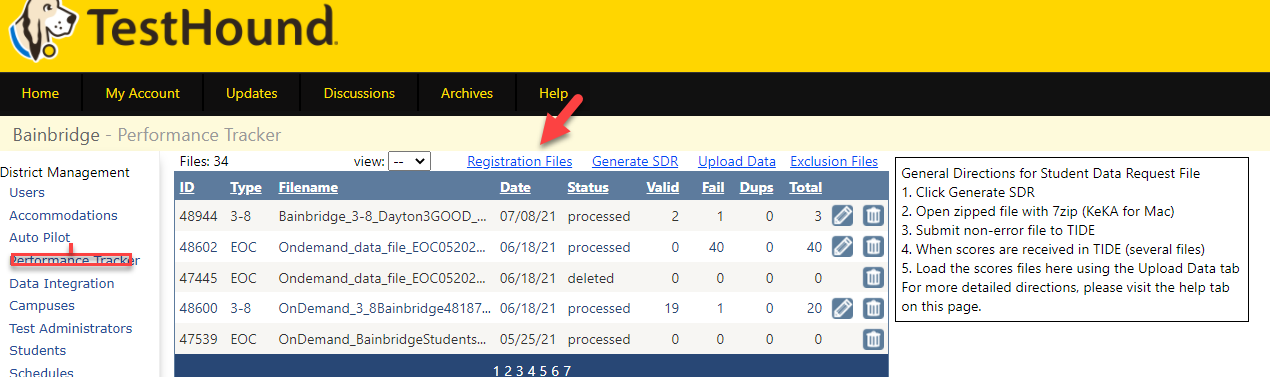
Performance Tracker allows you to upload current STAAR and historical student score data files, generate Student Data Requests (SDR) files, and generate registration files.
| Expand | ||
|---|---|---|
| ||
To Batch Upload Score Files, click on the Performance Tracker tab in your District Management Menu and select Upload Data. A new window will open. 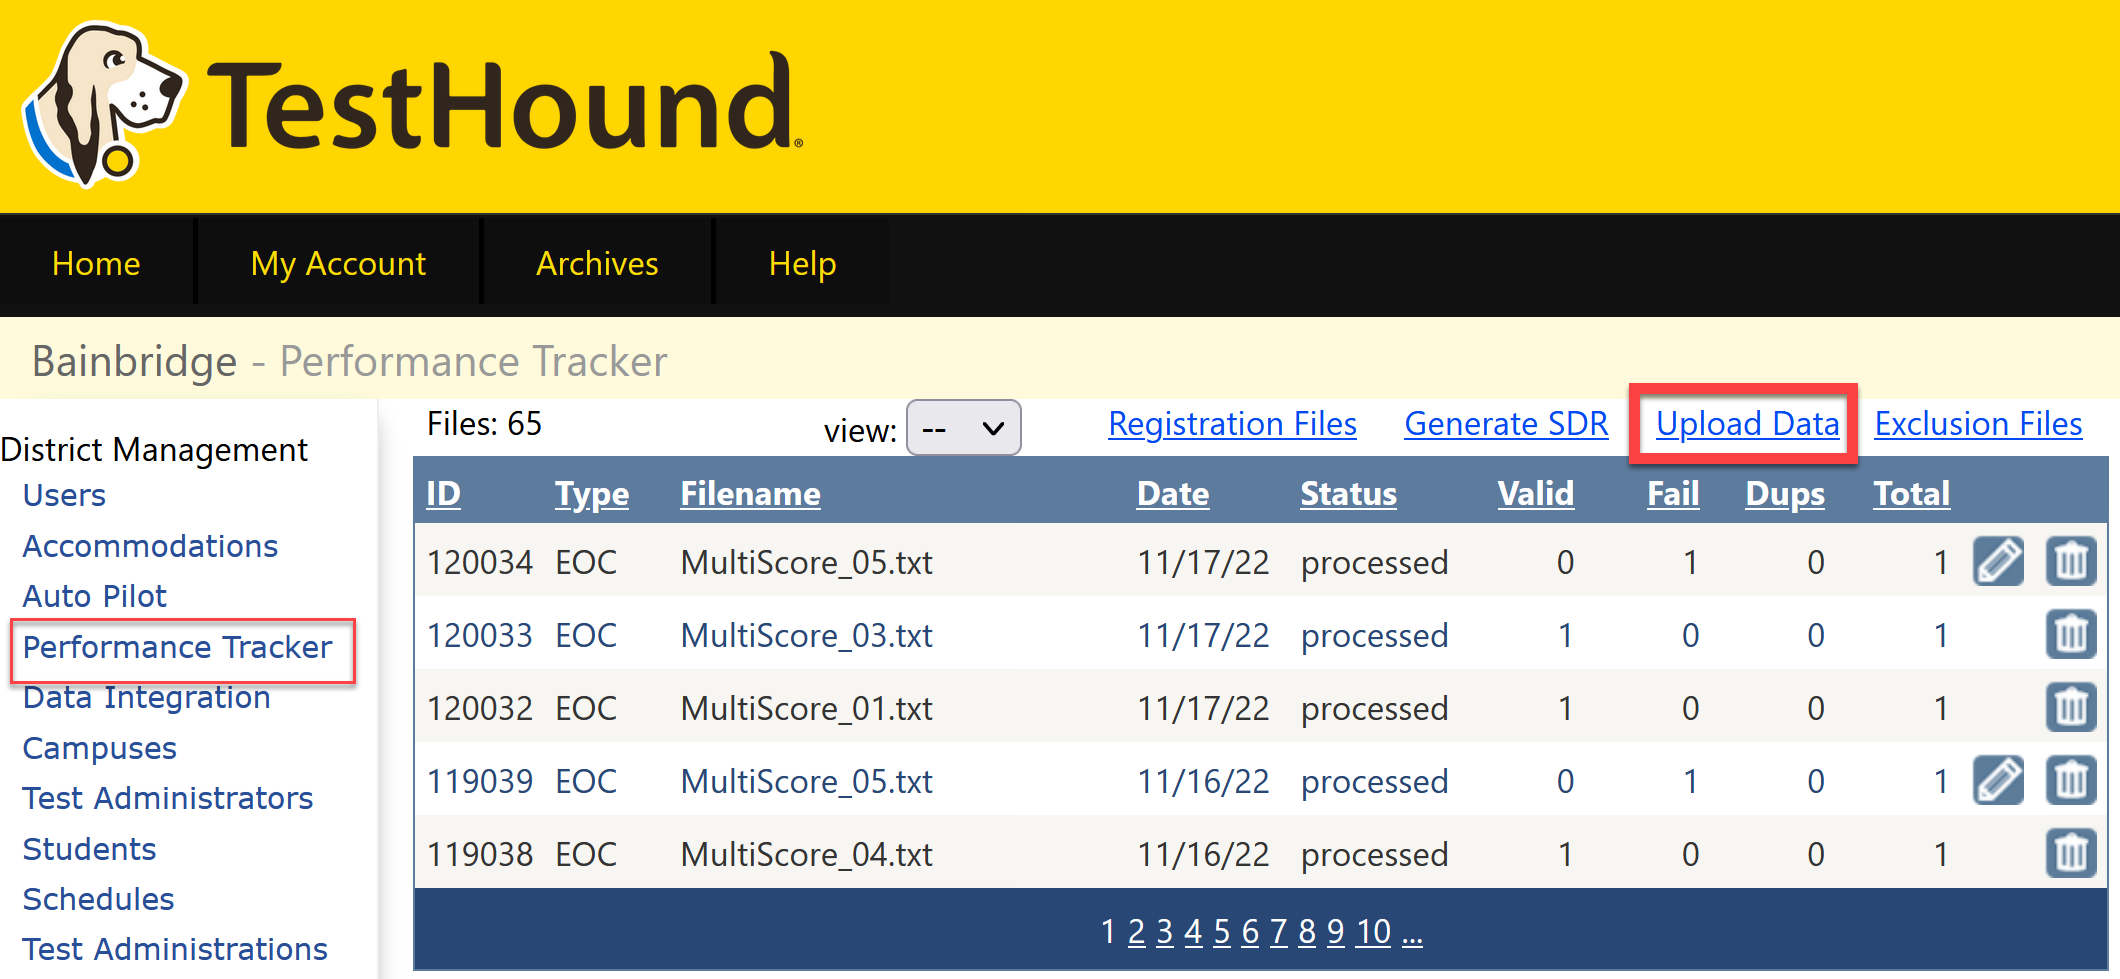 Next, using the name of the file, select a Data Set. For EOC files, find the 4 digit numerical code in the file name, which will tell you the admin and the year of the scores. EX: 1522 is Spring of 2022. 1320 is Fall of 2020.( For your reference, 13-Fall/Dec., 15-Spring, 16-Summer and the last 2 digits are the year.) 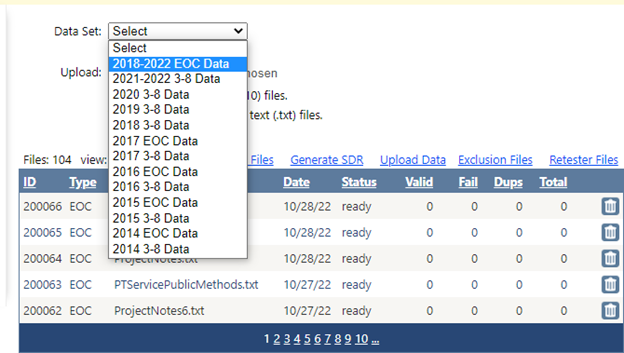 Then select the “Choose Files” button. 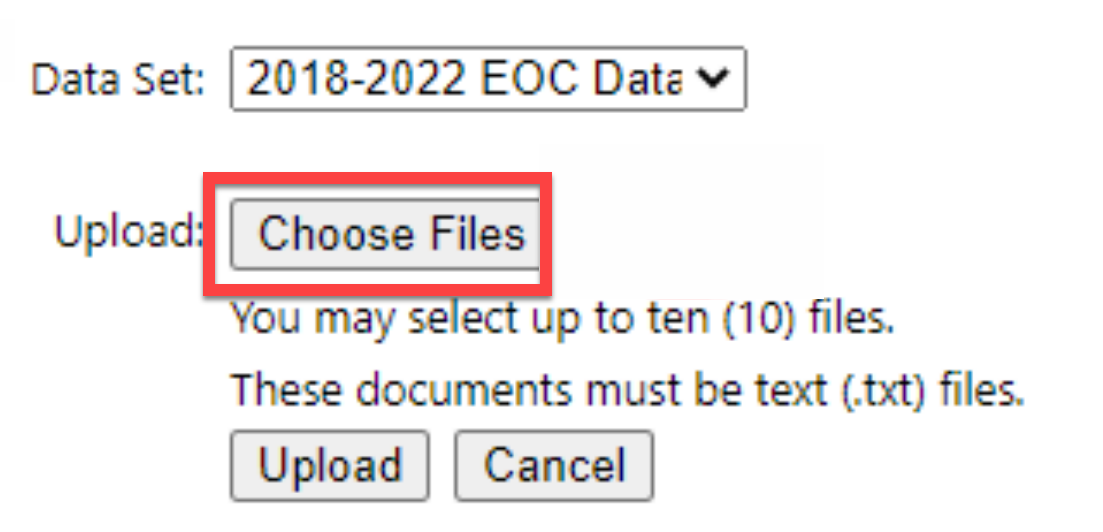 *Be sure to choose only .txt files. A maximum number of 10 files may be selected and processed per batch. To select multiple files for your batch, hold the ctrl button on your keyboard while selecting multiple files from your computer. All files chosen in the batch must match the same data set. Next, select the “Open” button. The selected file count will be displayed. NOTE: You can’t upload the zip file from the vendor. You must open it and download all the individual files inside, then upload those, in batches of 10, to Performance Tracker. 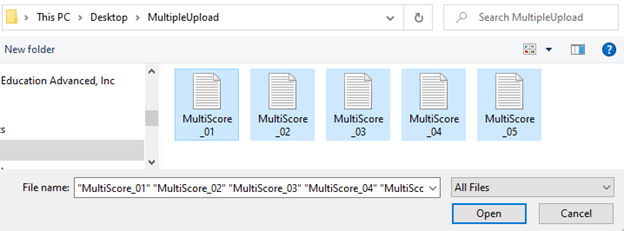 Then select the “Upload” button to upload your files. 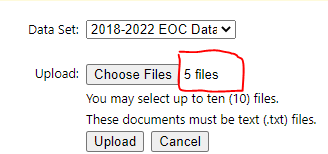 After uploading, you will receive an email when the files have been processed. Each file will be displayed in your Performance Tracker table and show a status of ready. You do not have to wait for one batch to process before uploading the next batch. 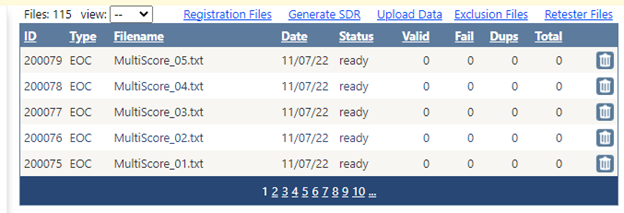 Once the files are processed they will show a processed status in the table. 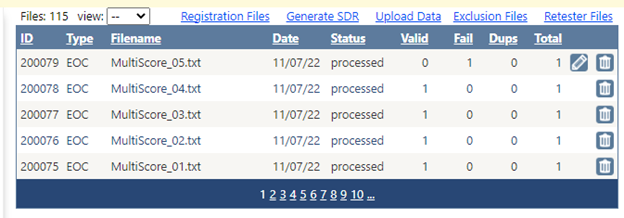 NOTE: When EOC data files are uploaded, Performance Tracker will pull in the cumulative test data records. |
...
| Expand | ||
|---|---|---|
| ||
Performance Tracker will allow the creation of the SDR (Student Data Request) file that will capture test history for students who tested outside of your district. Prior to generating the SDR file, download the 7-zip utility to open the encrypted file. (7-zip only works on PCs. Mac users will need to install a program such as KEKA or RAR Extractor) Navigate to the following web address to download the free 7-zip utility program: www.7-zip.org Once at the website, a table at the top of the web page will appear with the choices below: 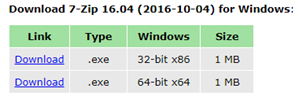 If unsure of the type that should be downloaded, select the link for the 64-bit version. Once the 7-zip utility is installed, return to TestHound. **Before generating an SDR file, all student alerts should be accepted at the campus level to ensure all students are at the correct campus and all new students have been processed.** Cambium also requires that all students be “registered” in TIDE before they will release score data. You can use the “all student registration” file to upload to TIDE before you do an SDR. See the question “How Can I Generate a Registration file”. Upload the all student registration file and allow it to process before submitting an SDR to Cambium. When you are ready to generate an SDR: In Performance Tracker, click Generate SDR  A new window will open giving you the option of pulling the SDR for only your flagged kids ( your new kids, kids who have re-enrolled, or kids without scores in TestHound) OR you can pull an SDR for ALL of your students in the event you feel that you have some kids whose scores did not populate when pulling the SDR at a previous time. It will prompt you to create a password that can be used to open the encrypted zip folder that will be sent to you. The password must be a minimum of 12 characters and consist of only numbers or letters. Once you have typed in the password select Generate. 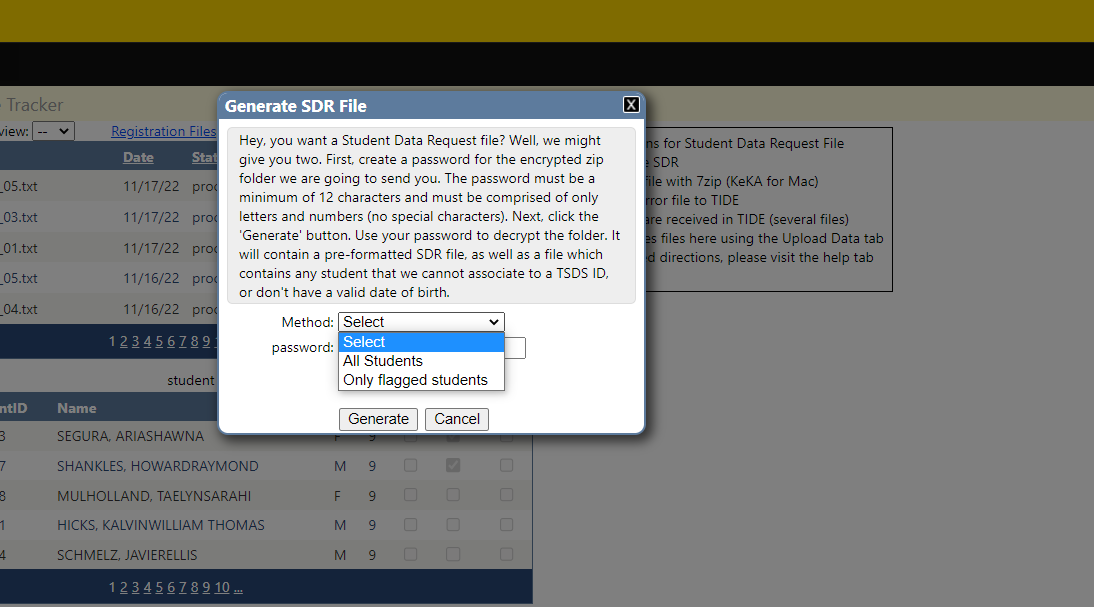 When the file has been downloaded right-click or in Chrome select the arrow to the right of the file name, then choose Show in folder. 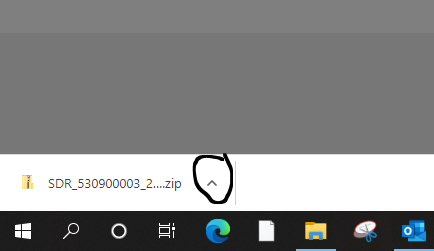 The Downloads folder will open and the zipped folder titled SDR_ [District ID] _[Date] will appear.  Right-click on the zipped SDR folder and choose 7-Zip > Show more options> Extract here. 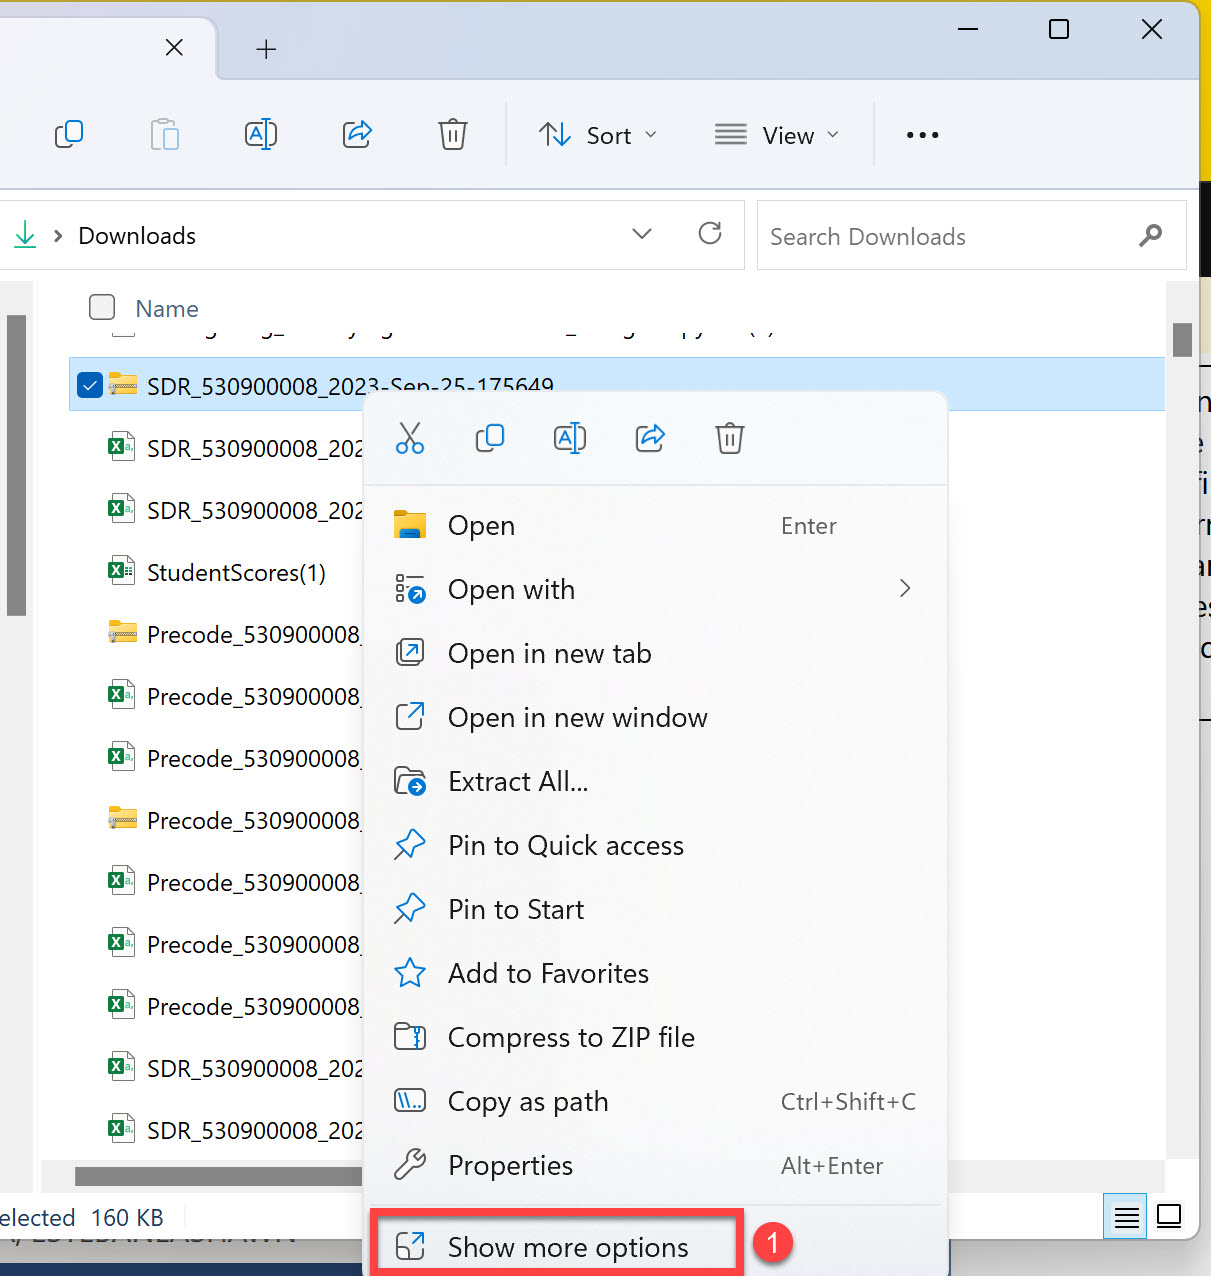 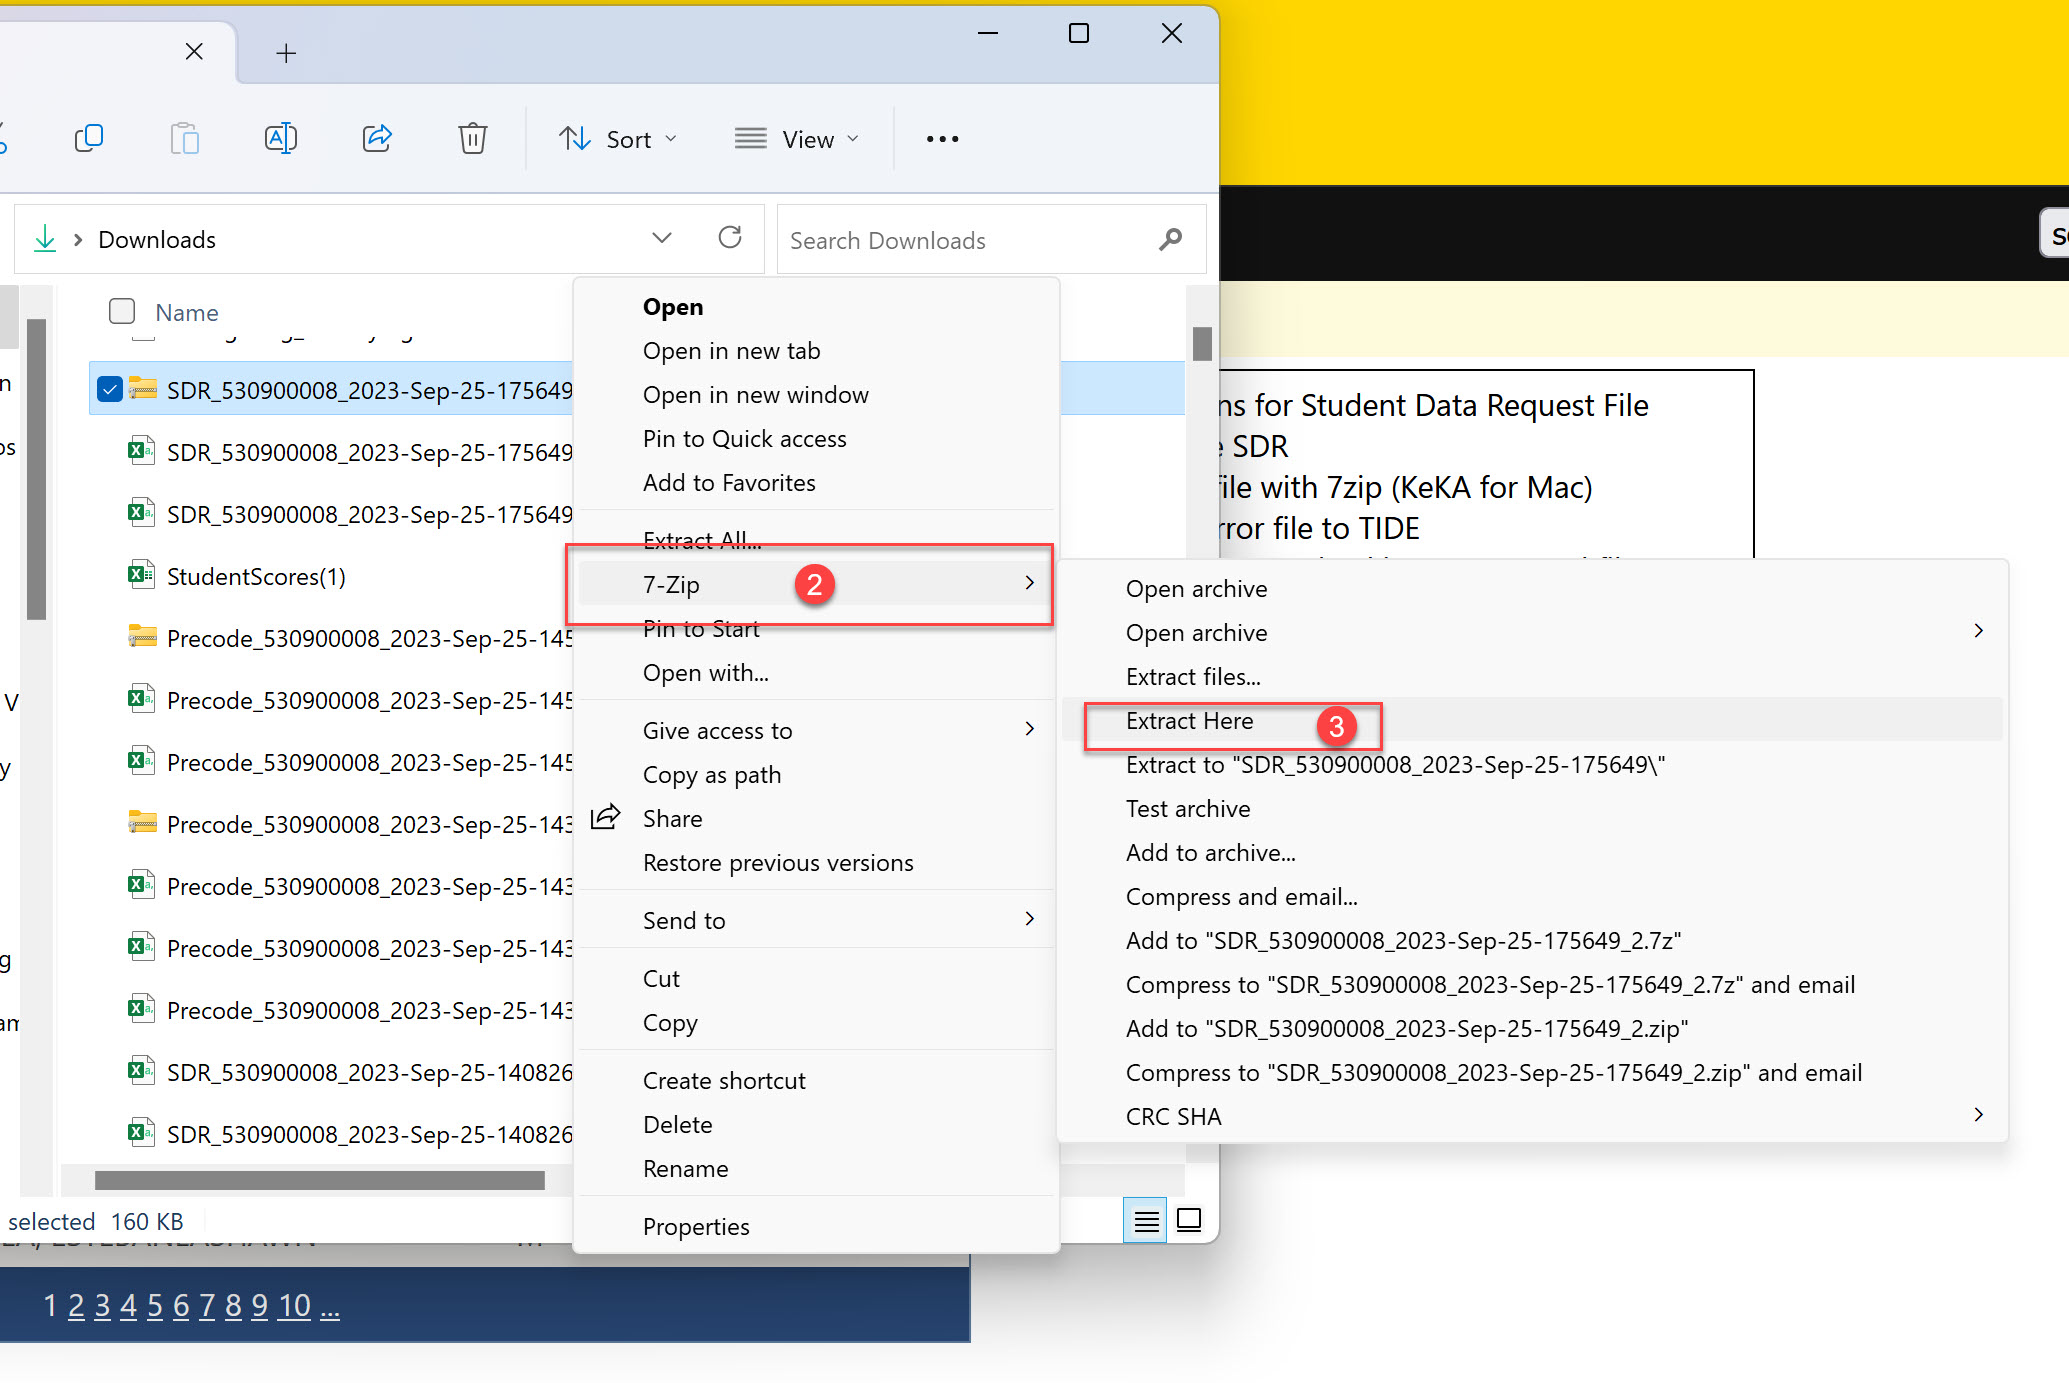 You will need to put the password in again. The window below will open indicating when the files have been extracted. When the process is complete, select Close. 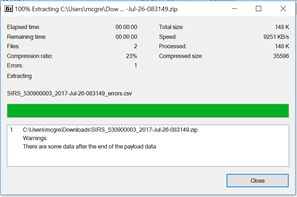 Under the zipped folder, there will be two files.  The first file will be the pre-formatted SDR file that can be submitted in TIDE to retrieve test data for students. The second file (with “errors” in the name, )contains records indicating students whose data could not be matched to a TSDS ID or Date of Birth in the demographics file being submitted by the district. Once you have your non-error SDR file saved that you generated in TH.
After initial files have been loaded into TestHound you may pull an SDR to request performance history on new and re-enrolling students in your district. Before doing so, it is best practice, to have all campuses accept their student alerts so that you have the most up-to-date student information in your file. Students’ enrollment status in TestHound will indicate if they are pulled into the file. For a complete record of ALL students' scores, A score file should also be uploaded after results from each test administration are received to keep performance history current. |
| Expand | ||
|---|---|---|
| ||
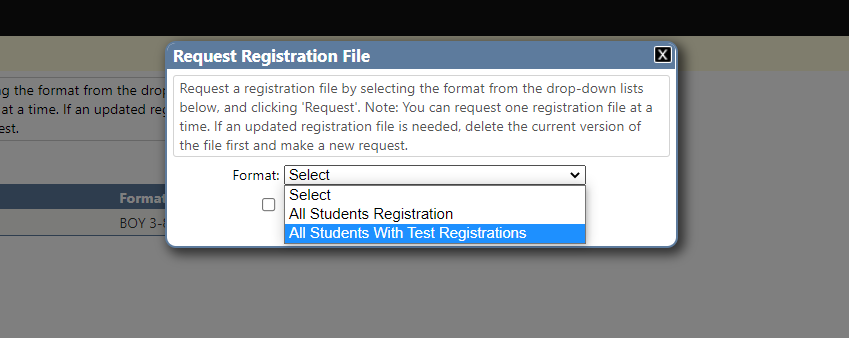
Performance Tracker will allow the generation of a registration file that is uploaded to the state testing vendor to register students in TIDE. The “All Student Registration“ file will allow you to upload all your TestHound students into TIDE for ease in pulling a Student Data Request in Cambium to obtain past student test performance. The “All Student Registration” file will not register students for testing. It simply adds your students to the Cambium system. You can also generate an “All Students with Test Registrations” file. This will automatically flag students for test registration. Students do NOT need to be in a test in TestHound. (Campuses should process all student alerts (new, unenrolled, reenrolled) prior to this, to ensure student statuses are updated. ) This new process will pull all students in grades 3-8 in TestHound into the file based on enrolled grades. TELPAS students will be registered for TELPAS testing based on their current EL status, and STAAR Alt students will be included based on that designation on their Accommodation page in TestHound. Retesters will be included using their performance history in Performance Tracker. Students who need to retest but do not have a performance history in TestHound can be added to the appropriate test in TestHound and then will be included in the file. STAAR 3-8 above grade level testers will need to be added to the appropriate test and then the Above Grade Level Report can be run to capture the above grade level status and uploaded to TIDE. EOC students and STAAR ALT EOC students will be added for EOC registration based on the Course Association that will need to be performed by the district in the Schedule menu, Course Assoc. tab. 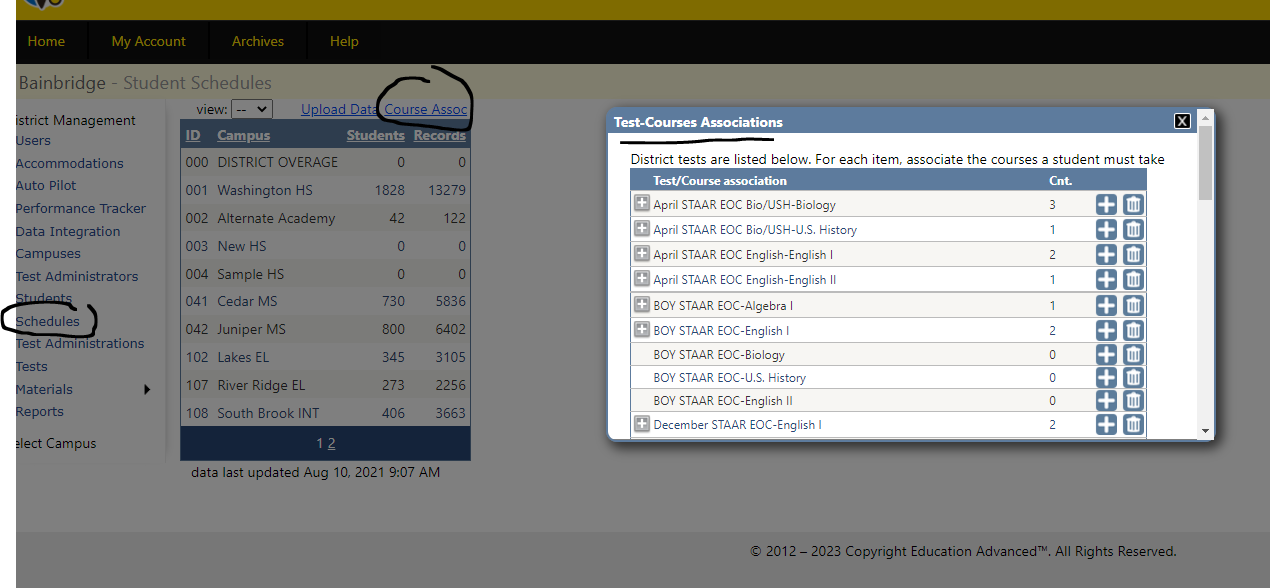 Mapping each course required to take each test will ensure that the appropriate students are included in the registration file. Click the + on the right to add each course associated with that particular EOC test. Be sure to do all 5 Spring EOC courses and the STAAR Alt2 EOC courses as well. Map all courses including any Honors, AP, Dual Credit, etc. that would require the students to take the test. Courses with the same course number will only show to be mapped once. For detailed directions on the course, mapping click Here: How do I map EOC courses for Test Registration To extract the registration file from TestHound, download the 7-zip utility to open the encrypted file. (7-zip only works on PCs. Mac users will need to install a program such as KEKA or RAR Extractor) Navigate to the following web address to download the free 7-zip utility program: www.7-zip.org Once at the website, a table at the top of the web page will appear with the choices below:  If unsure of the type that should be downloaded, select the link for the 32-bit version. Once the 7-zip utility is installed, return to TestHound. To generate a registration file, click Performance Tracker, and select Registration Files. IF YOU HAVE PREVIOUSLY GENERATED A FILE, YOU WILL NEED TO DELETE IT TO REQUEST A NEW ONE.
Click Request Registration 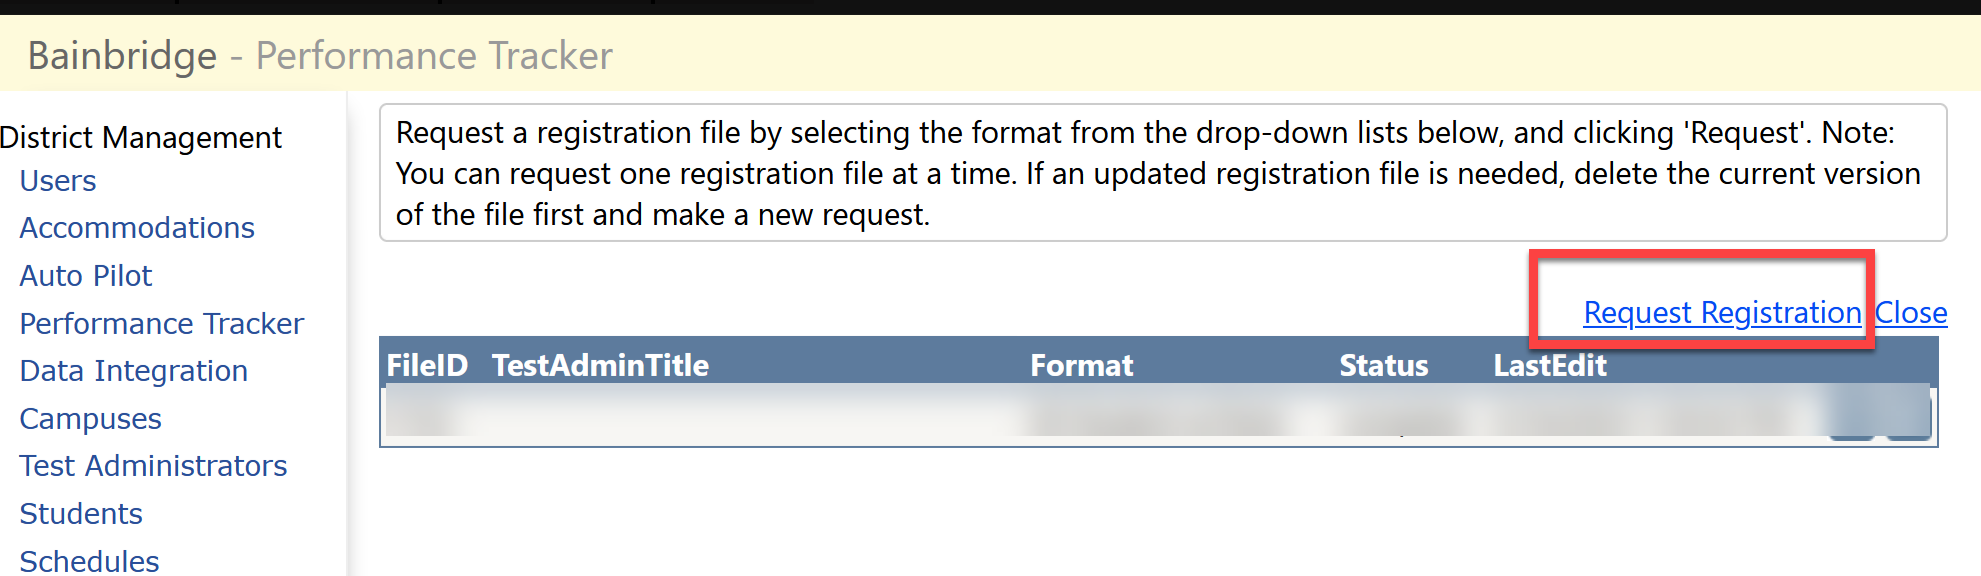
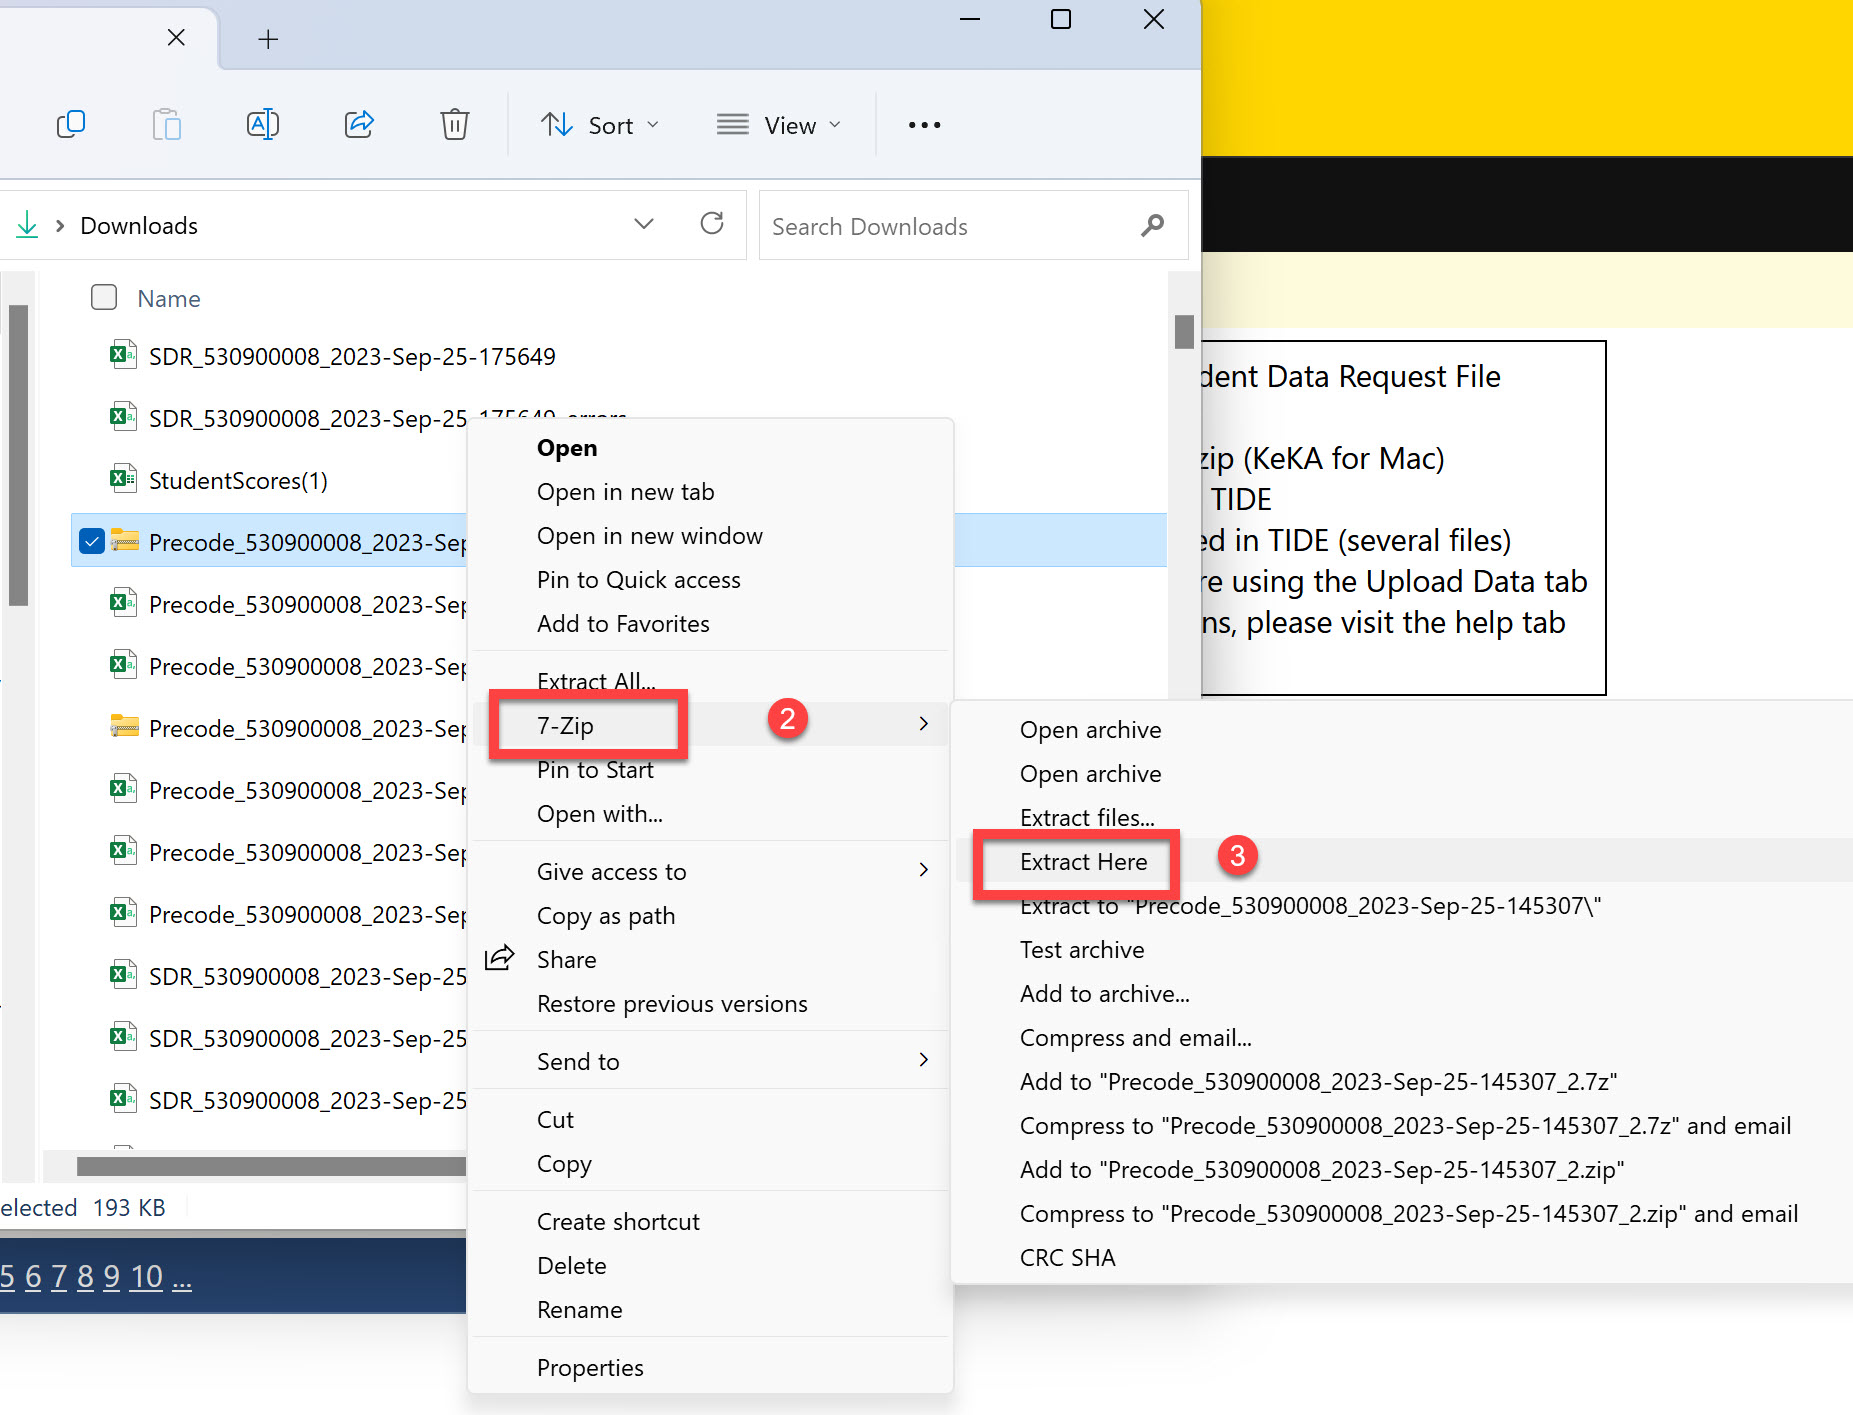
Select “All students with Test registration”. The file will begin to generate and you will receive an email when it is ready. You can return to the Registration page to download your file once it has been processed. Once appropriate selections have been made, choose Request. 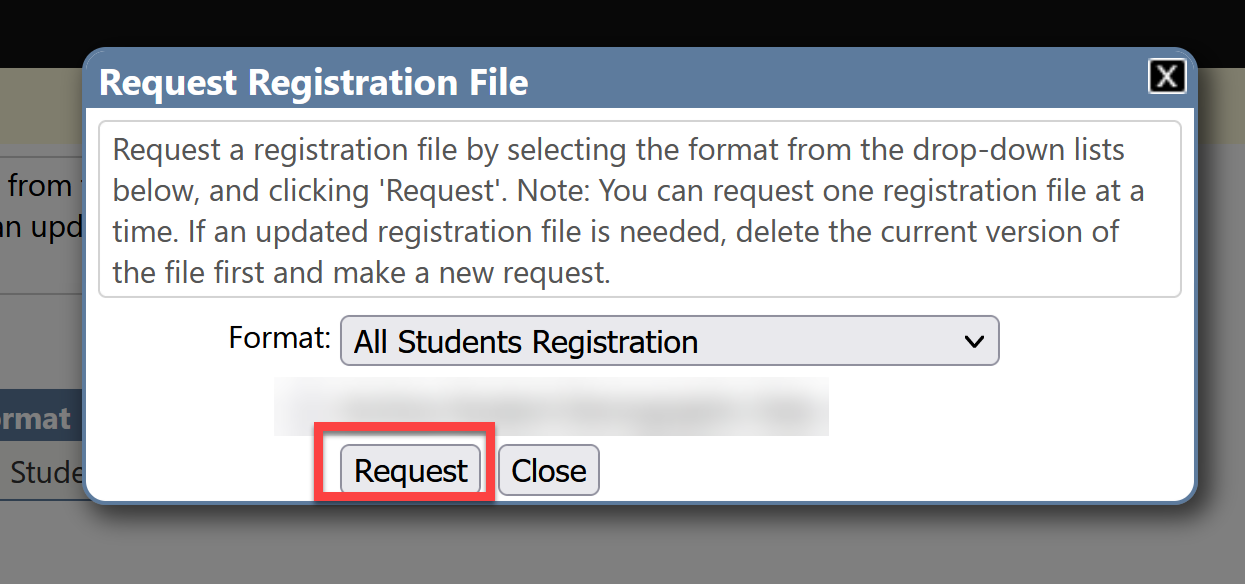 Files are processed in a queue and the length of time to generate the file depends on the size of the district and the number of requests ahead of the file in the system. 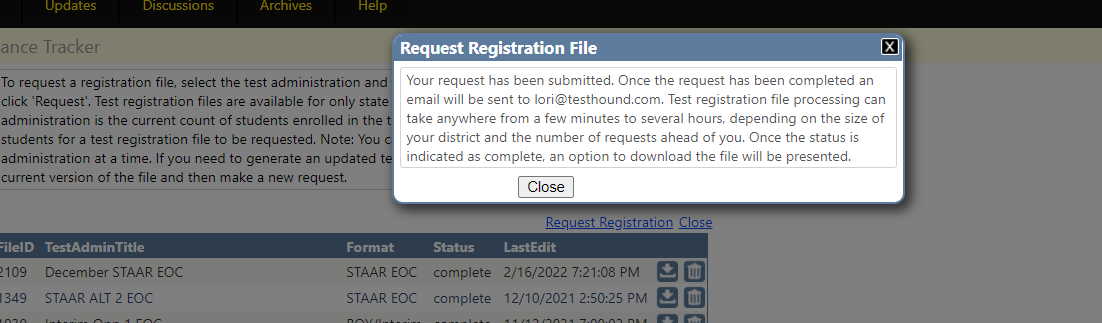 When the email is received with the notification of the registration file being ready, select Performance Tracker > Registration Files. A window will appear with the files that have been requested. Select the Download icon next to the appropriate file.  A new window will open requesting a 12-character password and select Download to receive the file. This password will be used to open the encrypted file. 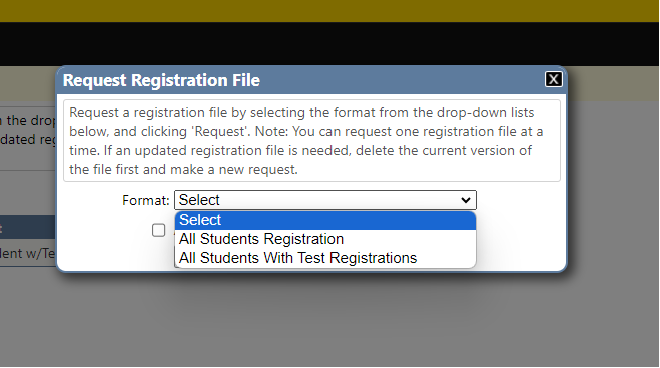 When the file has been downloaded right-click or in Chrome select the arrow to the right of the file name, then choose Show in a folder. Open the Downloads folder on your computer to access the file. 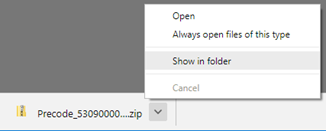 When in the Downloads folder a zipped folder titled Precode_ [District ID] _[Date] should appear. Right-click on the zipped folder and choose 7-Zip > Show more options>Extract files Here. 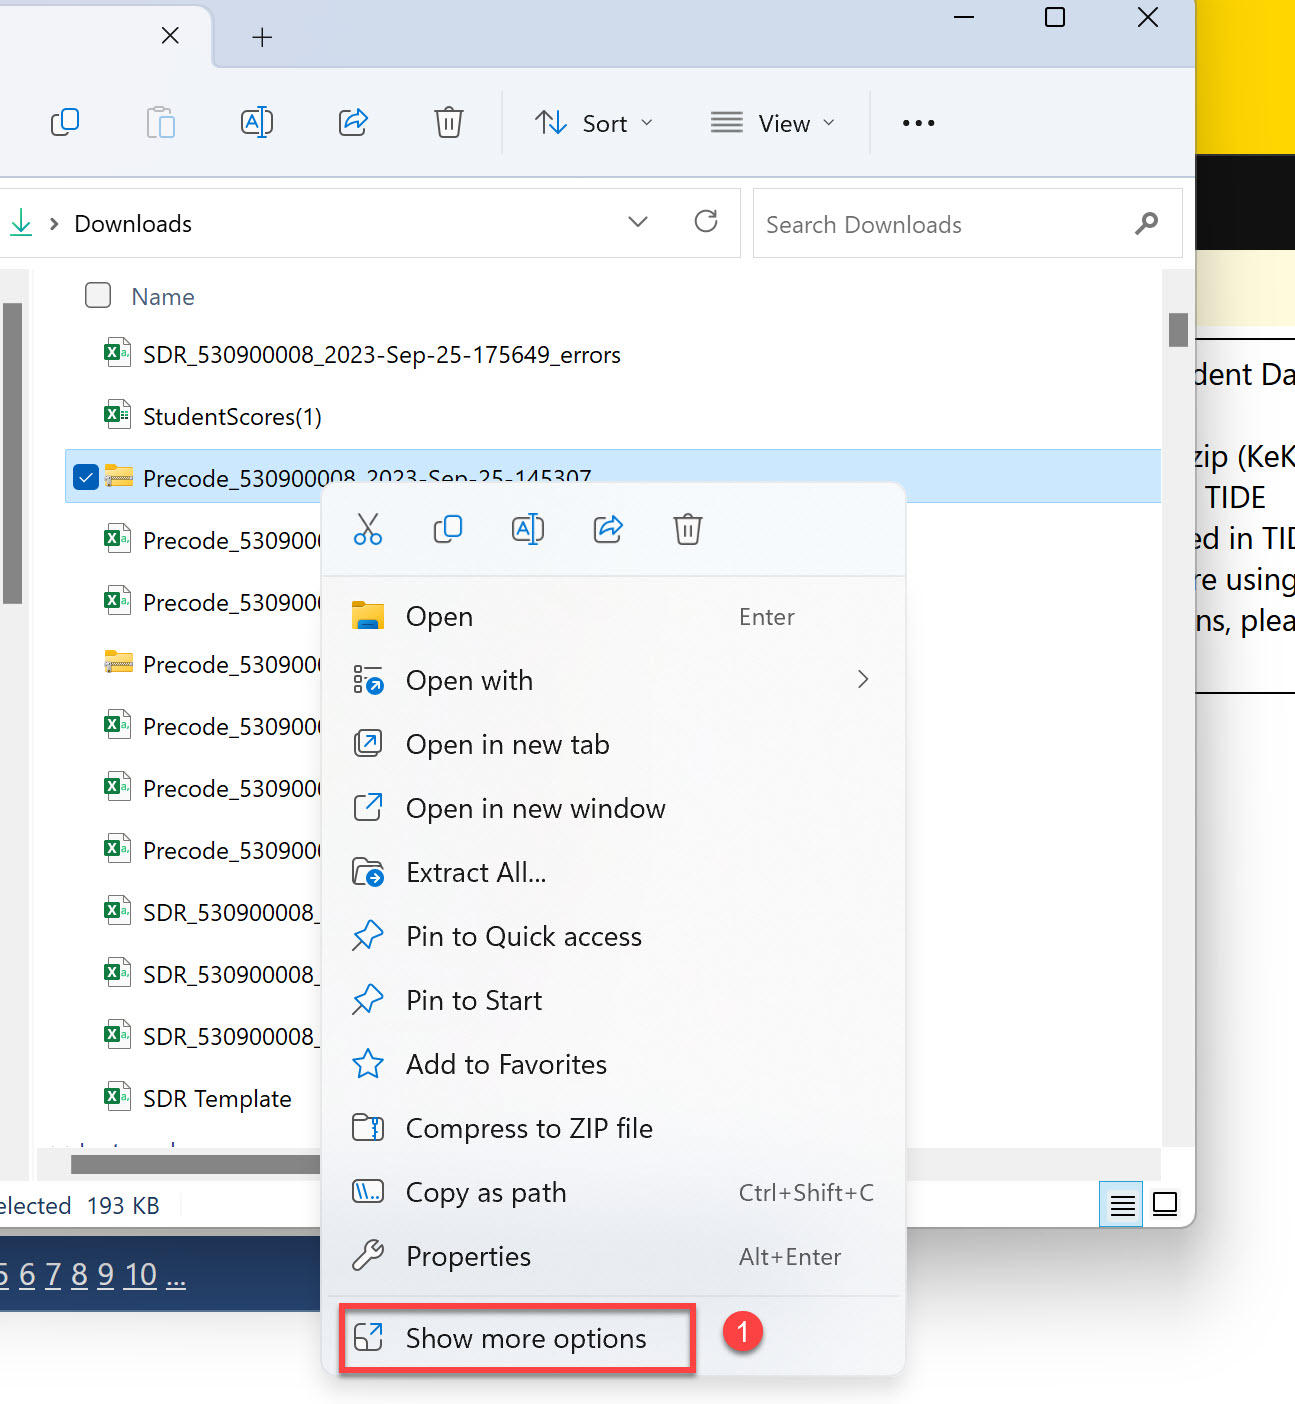
A new window will open prompting the selection of a location where the files will be extracted and to enter the password that was created when generating the file in TestHound. Next, select OK. 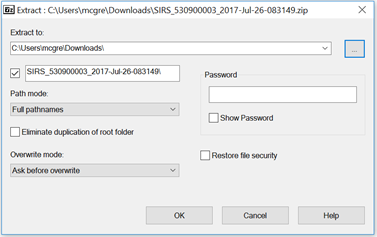 The window below will open indicating when the files have been extracted. When the process is complete, select Close.  A new folder will appear within the designated location. Open the folder and within there will be two files.  The first file will be the registration file that can be submitted to the vendor to register students for testing. The second file Precode_[District ID]_Date_errors contains records indicating students who have incomplete data in the demographics file being submitted by the district and can be used to clean up the data being received through the demographic file.  IN TIDE, click on Student Information, choose Upload Student Information, click Browse to find your file and upload it. |
...
| Expand | |||||||||||||||||||||||||||||||||||||||||||||||||||||||||||||||||||||||||||||
|---|---|---|---|---|---|---|---|---|---|---|---|---|---|---|---|---|---|---|---|---|---|---|---|---|---|---|---|---|---|---|---|---|---|---|---|---|---|---|---|---|---|---|---|---|---|---|---|---|---|---|---|---|---|---|---|---|---|---|---|---|---|---|---|---|---|---|---|---|---|---|---|---|---|---|---|---|---|
| |||||||||||||||||||||||||||||||||||||||||||||||||||||||||||||||||||||||||||||
I. Accessing the Upload Exclusion feature 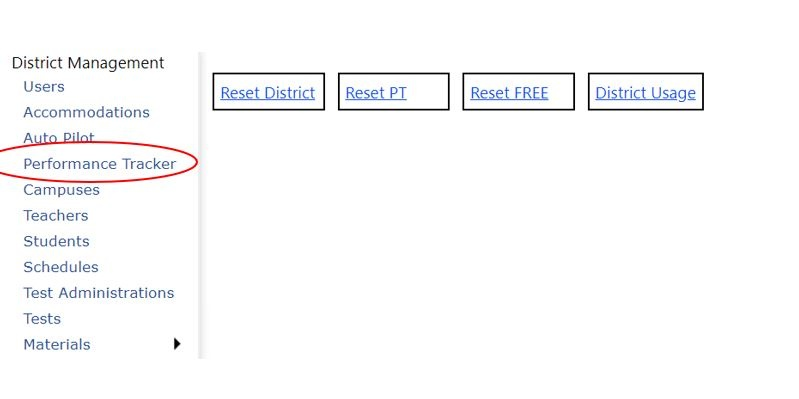 Step 1. From the District Management Screen, Click on Performance Tracker. 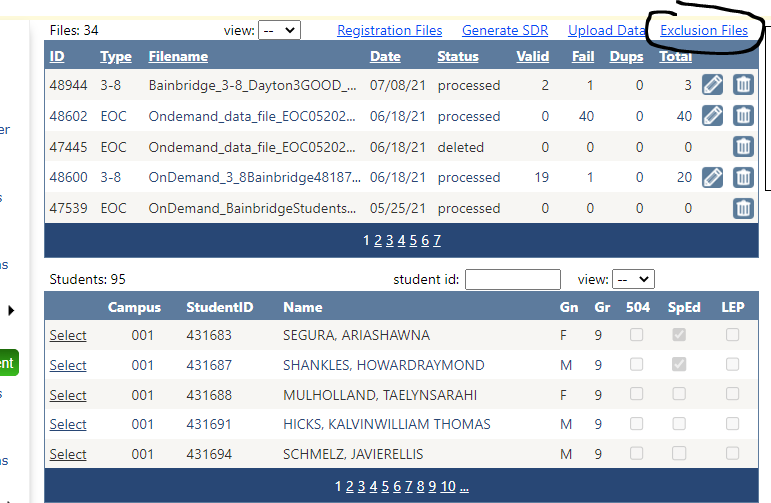 Step 2. Click on Exclusion Files in the upper right corner. II. When creating a template to upload-it is helpful to name your files uniquely so they are easily identifiable later. You can download our template here or skip to step 4 to build your own. Step 3. Download the template and populate it with the necessary fields
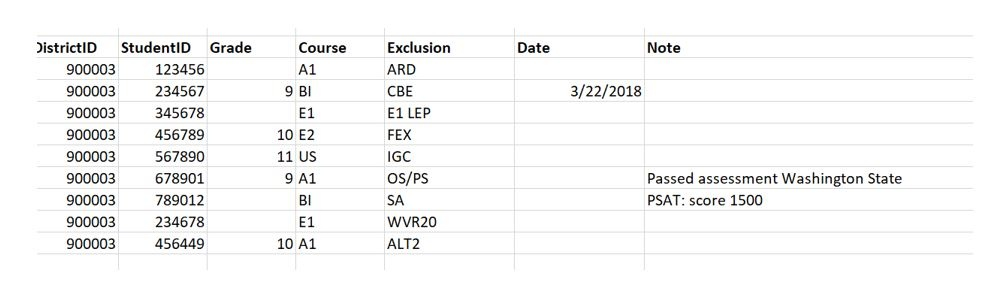
Step 4. Or in an Excel Spreadsheet, create the column headers- (this is beneficial if a spreadsheet has already been created for some fields). DistrictID StudentID Grade Course Exclusion Date Note III. Column Header-no spaces in the header titles  IV. Field Descriptions
V. Upload the Data Step 1. Save the spreadsheet as a CSV (Comma-delimited-.csv) Note to Mac users: When saving the file, instead of choosing Save As CSV (Comma delimited), there should be an option for CSV UTF-8 (Comma delimited). Saving it with that format will prevent upload errors associated with the file format. Step 2. Click on the Upload Exclusions link. 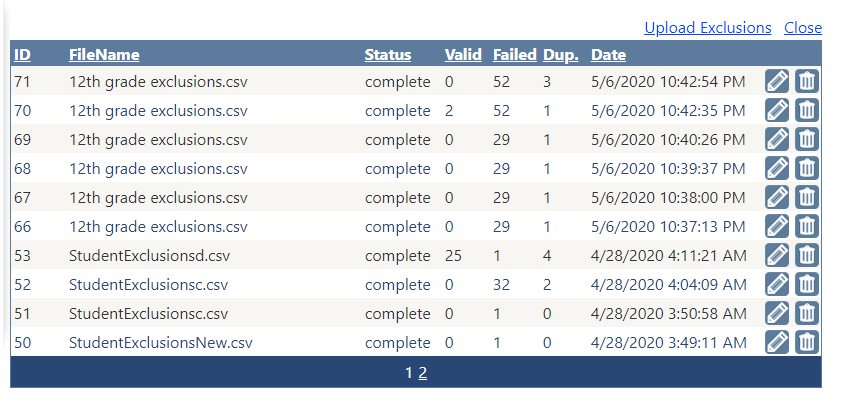 Step 3. Upload the .CSV file 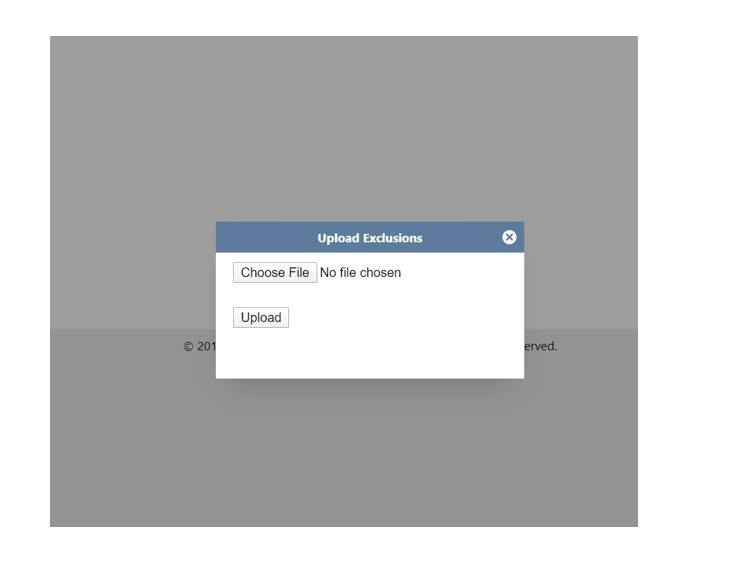 Step 4. When clicking on a student’s name, go to the Student Details Page (under Campus Management), the contents of the file will be applied to each student contained in the file. 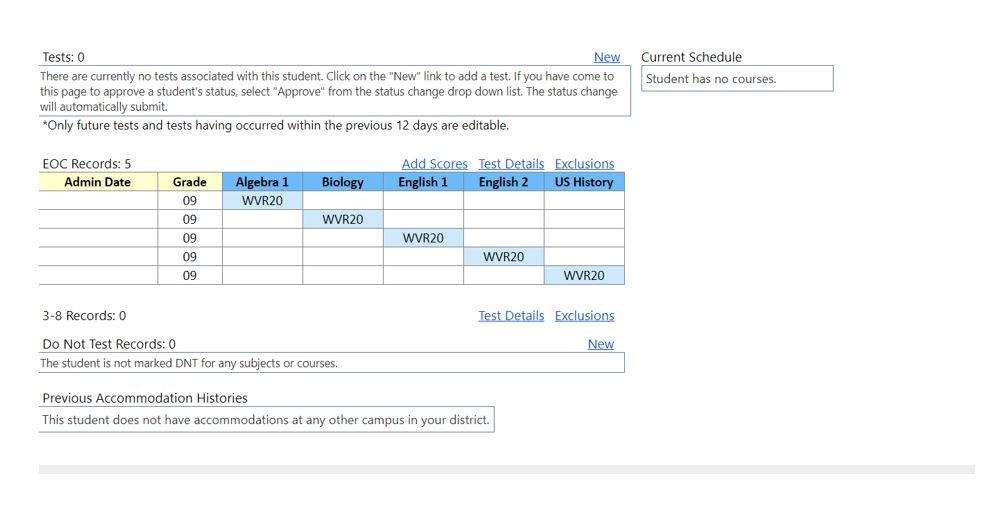 Step 5. After uploading the file, check for errors and duplicates by clicking on the Upload Exclusions button. Then the pencil beside the uploaded file. A list of duplicate records and invalid student IDs will be listed below.  Errors  Files can also be deleted to remove data from all students in the file, in case of errors, and then corrected and reloaded. | |||||||||||||||||||||||||||||||||||||||||||||||||||||||||||||||||||||||||||||
...