This page will show the TestHound components available on the student page and how the CTC can use this page.
...
| Expand | |||||||||||||||||||||||||||||||||||||||||||||||||||||||||||||||||||||||||||||
|---|---|---|---|---|---|---|---|---|---|---|---|---|---|---|---|---|---|---|---|---|---|---|---|---|---|---|---|---|---|---|---|---|---|---|---|---|---|---|---|---|---|---|---|---|---|---|---|---|---|---|---|---|---|---|---|---|---|---|---|---|---|---|---|---|---|---|---|---|---|---|---|---|---|---|---|---|---|
| |||||||||||||||||||||||||||||||||||||||||||||||||||||||||||||||||||||||||||||
I. Accessing the Upload Exclusion feature  Step 2. Click on Exclusion Files in the upper right corner. II. Creating a template to upload-please name your files uniquely so they are easily identifiable later. Step 3. Download the template and populate it with the necessary fields
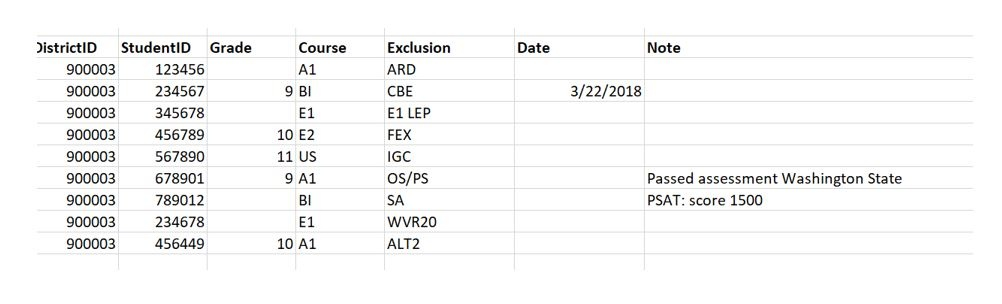
DistrictID StudentID Grade Course Exclusion Date Note III. Column Header-no spaces in the header titles 
V. Upload the Data Step 1. Save the spreadsheet as a CSV (Comma-delimited-.csv)Note to Mac users: When saving the file, instead of choosing Save As CSV (Comma delimited), there should be an option for CSV UTF-8 (Comma delimited). Saving it with that format will prevent upload errors associated with the file format. Step 2. Click on the Upload Exclusions link. 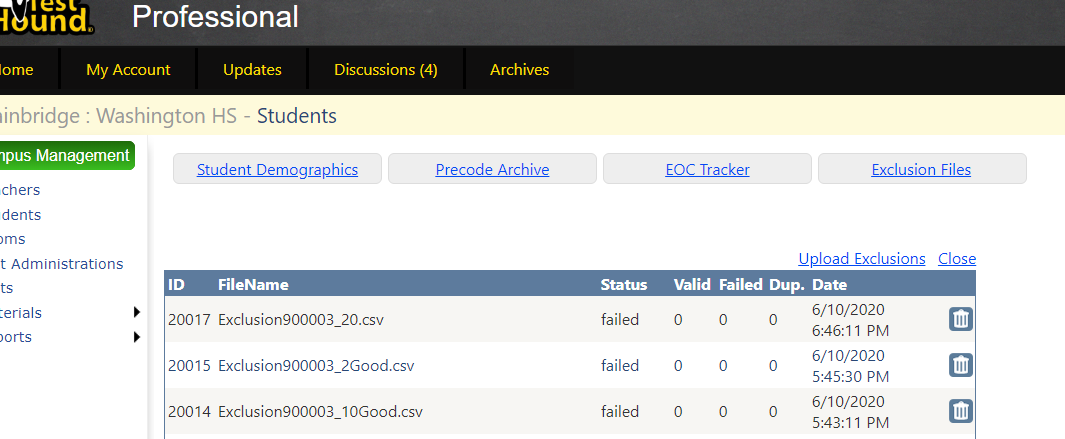 Step 3. Upload the . CSV file 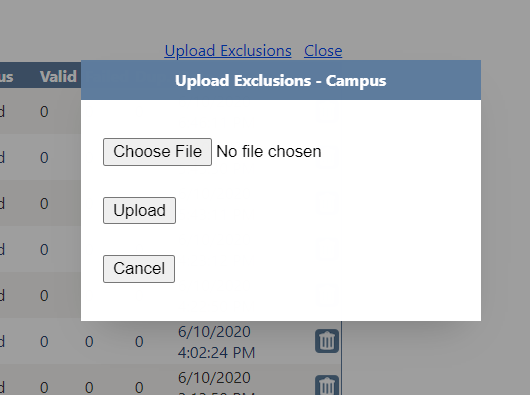 Step 4. When clicking on a student’s name, go to the Student Details Page (under Campus Management), the contents of the file will be applied to each student contained in the file.  Step 5. After uploading the file, check for errors and duplicates by clicking on the Upload Exclusions button. Then the pencil beside the uploaded file. A list of duplicate records and invalid student IDs will be listed below.  Errors 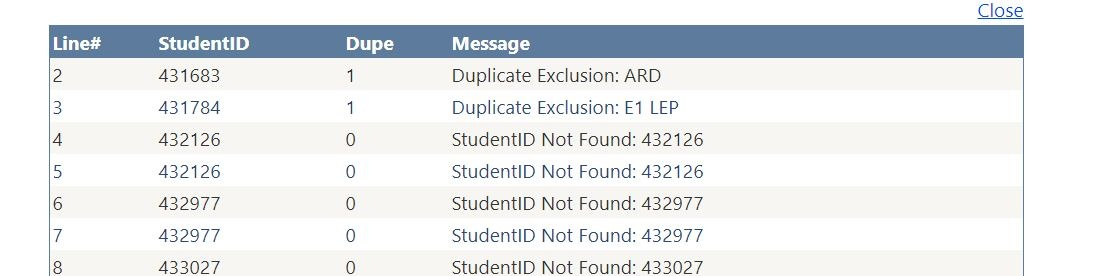 Data can be corrected manually by clicking on the student's name and editing in the PT table or the file can be deleted to remove the data from all students in the file, the file can be corrected, and then reloaded. | |||||||||||||||||||||||||||||||||||||||||||||||||||||||||||||||||||||||||||||
...